Getting Started
Let’s walk you through a simple example step by step.
In this guide, we will:
create a Jeroboam app
register a view function
add some view argument configuration to it for inbound data validation
add a response_model to the endpoint for outbound data validation
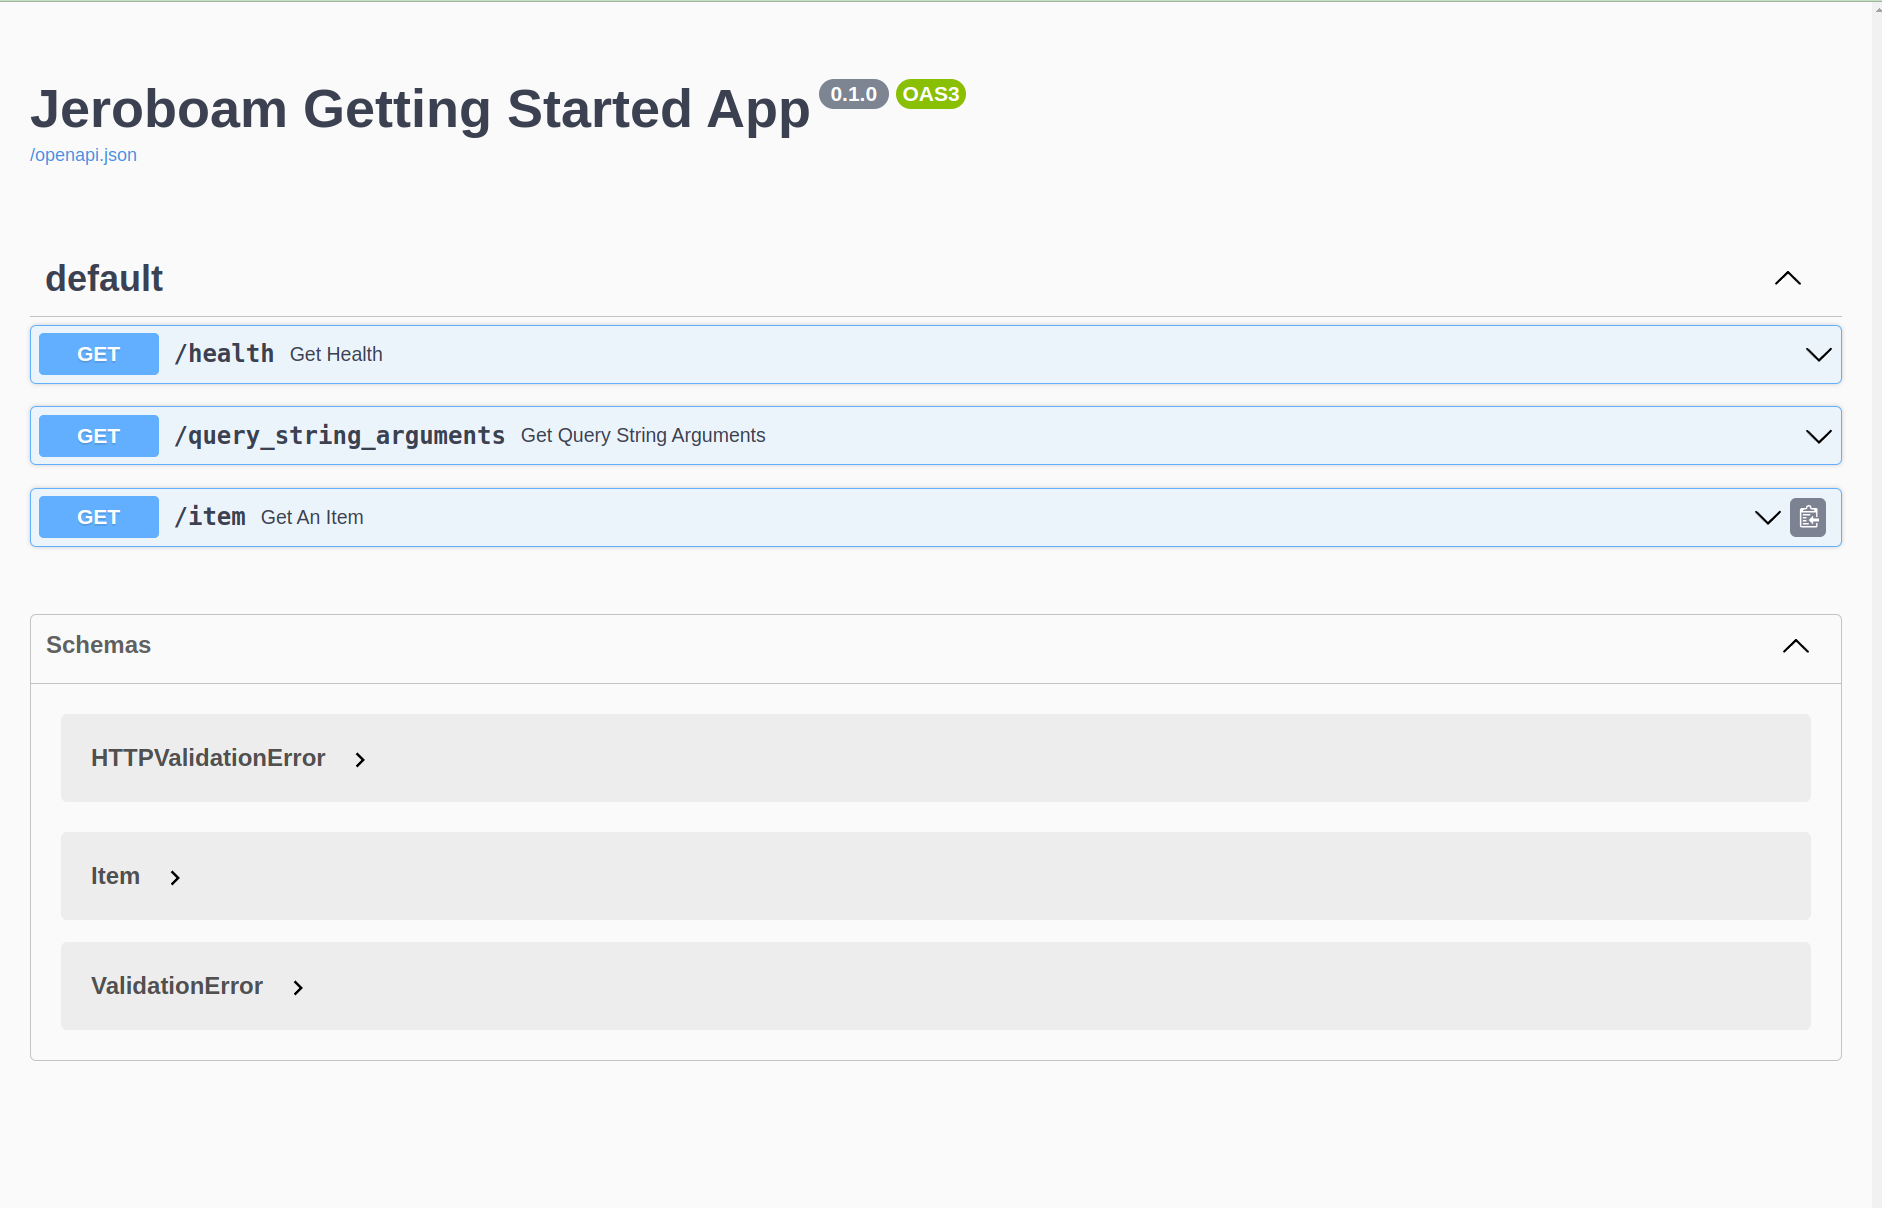
register the OpenAPI blueprint to get a look at the generated documentation
Create a Jeroboam App
Let’s start with creating the application object.
1from flask_jeroboam import Jeroboam
2
3app = Jeroboam("Jeroboam Getting Started App")
Notice the highlighted import and app creation. The app creation is straightforward—the Jeroboam class subclasses Flask’s Flask application object, so you can use it as a drop-in replacement.
1from flask_jeroboam import Jeroboam
2
3app = Jeroboam("Jeroboam Getting Started App")
4app.init_app()
The highlighted init_app() call is essential. Call this method after loading the configuration to your app—it registers OpenAPI blueprints and generic error handlers. You can always opt-out with appropriate configuration values (see here).
1if __name__ == "__main__":
2    app.run(host="localhost", port=5000)
The highlighted block at the bottom is a convenient way to start the app by running the file directly.
Note
The application factory pattern is usually a good practice [1] and should be followed when you start an actual project.
Register a view function
Registering a view function means binding a python function to an URL. Whenever a request sent to your server matches the rule you defined, the registered function, called a view function, will be run.
You can register a view function in several ways in Flask. The preferred way in Flask_Jeroboam is to use method decorators. Notice the highlighted decorator in the code below:
1@app.get("/health")
2def get_health():
3    return {"status": "Ok"}
Here we are telling the app instance that when it receives an incoming GET Request to the URL /health, it should call the get_health function and return the result to the client. Let’s try it. Run your file and start poking.
$ curl http://localhost:5000/health
{"status": "ok"}
Note
Although you can register view functions directly on the app instance, any project beyond the size of a classical tutorial will benefit from using the modularity of Blueprints [2], and you will find yourself using blueprints more than your app instance. The good news is that you register view functions on blueprints as you do on the app instance.
Adding View Arguments
Let’s try something more interesting. So far, our Jeroboam application behaves like a regular Flask application.
Let’s register a view function that takes parameters. Look at the highlighted function definition below—it shows a view function with type hints and default values on its parameters.
1@app.get("/query_string_arguments")
2def get_query_string_arguments(page: int = 1, per_page: int = 10):
3    return {"page": page, "per_page": per_page}
This view function’s only purpose is to help us inspecting the values the function actually receives when it is called and this is precisely what we will do.
$ curl 'http://localhost:5000/query_string_arguments'
{"page":1,"per_page":10}
So far, so good. The result was predictable. The function received the default values for the parameters. Let’s try something else.
$ curl 'http://localhost:5000/query_string_arguments?page=2&per_page=50'
{"page":2,"per_page":50}
Let’s take a closer look at the url we’re hitting: /query_string_arguments?page=2&per_page=50. The part after the ? is called a query string. It is a way to pass parameters through a URL. page=2&per_page=50 translates to two parameters, page and per_page with respective values of 2 and 50. Luckily that’s exactly what our view function is expecting. Flask-Jeroboam will parse the query string, validate the values (check they can be cast as int) and inject them into the view function.
The previous example showed us the parsing and injecting part. Let’s take a look at its validation capabilities by passing a page value that can’t be cast to an int. We will add the -w 'Status Code: %{http_code}\n' option to our curl command to print the status code of the response.
$ curl -w 'Status Code: %{http_code}\n' 'http://localhost:5000/query_string_arguments?page=not_a_int&per_page=50'
{"detail":[{"loc":["query","page"],"msg":"value is not a valid integer","type":"type_error.integer"}]}
Status Code: 400
Here, we got a 400 Bad Request response, with details about the error, telling us that the value of the page argument located in the query (“loc”:[“query”,”page”]) is not a valid integer (“msg”:”value is not a valid integer”).
Note
By default, the arguments of a GET view function are expected to get their values from the query string. It is their location. You can explicitly set the location of the arguments by using argument functions as default values (Exemple: page: int = Query(1)). Possible location for parameters include Path, Query, Header and Cookie. For request bodies, you can set locations to Body, Form and File. Body is the default location for POST and PUT requests.
You will find more information about this mechanics here.
Now that we have covered the basics of inbound handling, let’s look at the outbound parsing and validation. This is done by adding a response_model to our decorator.
Response Models
We start by defining a Pydantic BaseModel for response validation. Look at the highlighted sections below—the imports at the top and the Item model definition with its three fields.
1"""Response models."""
2
3from pydantic import BaseModel, Field
4
5from flask_jeroboam import Jeroboam
6class Item(BaseModel):
7    name: str
8    price: float
9    count: int = Field(1)
Now look at the highlighted endpoint that uses this model. The decorator includes response_model=Item, and the function returns only partial data:
1"""Response models."""
2
3from pydantic import BaseModel, Field
4
5from flask_jeroboam import Jeroboam
6@app.get("/item", response_model=Item)
7def get_an_item():
8    return {"name": "Bottle", "price": 5}
Let’s try it out.
$ curl 'http://localhost:5000/item'
{"name": "Bottle", "price": 5.0, "count": 1}
What happened is that the return value of the view function has been fed to the Item model. The price has been cast as a float, and the missing key-value of count has been added with its default value. The values have been validated and finally serialized into a JSON string.
Finally, to wrap up this first tour of Flask-Jeroboam, let’s take a look at the OpenAPI-compliant documentation our app was able to produce.
OpenAPI Documentation
When you visit http://localhost:5000/docs in your browser you should see the OpenAPI documentation for your API. It will look something like this:
Wrapping Up
In this page, we covered the three main features of Flask-Jeroboam:
Inbound data parsing and validation based on view function signatures
Outbound data validation and serialization based on response models
OpenAPI auto-documentation
To go further
If you want to learn more, you can check out our in-depth features tour.
We also mentioned:
Complete example code for this page can be found here. Examples are tested in this file.